If you were me, you would understand that photography is more of a professional requirement than an artistic endeavour, and while I enjoy clicking pictures, I need them to convey specific details like the machined texture of an aluminum encoder or the subtle tones of specific keys on a keyboard. My workflow isn’t much different though. I’m still spinning Lightroom or something open source photo editor as RapidRAWimport my files and color them carefully.
However, the moment I hit export, I worry that the results will look the same in the article, or produce surprises like washed-out colors, clogged texture details, and the overall look of a monotonous Instagram filter. Regardless of the type of photography you do, the equipment you use, and the editing tools you choose, this frustration can be avoided by simply changing two settings before you shoot. Export.
Color space is not a comfortable space
Especially if it goes from edit to export

When editing photos to showcase products in real-life settings, I try to bring back detail from highlights on shiny surfaces and adjust the white balance a bit if I’m not glued to the camera. I work too color calibrated display with three preset profiles for different times of day or ambient lighting conditions, so the colors in my photos stay consistent. From a hardware perspective, you’re working on something certified for 100% coverage of the DCI-P3 color gamut or 99% coverage of the AdobeRGB color space. However, this obsession with color space overlooks the proverbial our editing process.
In our focus on making the most of our hardware, whether it’s in an online article that uses sRGB color or a high-end AdobeRGB-preserving print that you use for editing, we lose sight of how the images will be used later. When you edit in a wide gamut color space, your raw processor maps those colors to the large palette your expensive monitor can display. Reds are deeper; greens are richer and contrast is dynamic. However, sRGB remains the lowest common denominator of digital displays, and the vast majority of people online still depend on it.
Admittedly, I exported images in Adobe RGB or ProPhoto RGB profiles using a The best quality Presets in Lightroom and wondering why they look dull, flat or washed out when posted online. What happens is web browsers and the site you’re loading don’t know what to do with that extra color information because it can’t be mapped correctly. So it gets thrown out entirely and the images are awkwardly scaled down to fit in the sRGB space. The result is a sudden, aggressive desaturation. The rich burgundy color of the custom leather magazine cover suddenly looks like washed-out brown plastic. The deep blacks of the in-ear monitor shell fade to a muddy gray.
Sometimes the changes are obvious, but without a RAW camera as a reference you can miss the inaccuracy. Anyway, the fix is very simple. If you need to edit in whatever large color space your monitor supports for maximum editing width, your photo editing software’s export settings should prioritize the end use case. For web delivery, I’d suggest defaulting to the sRGB color space, but instead of a hosting tool removing data it can’t parse, you leave it up to a high-end image editor to accurately match the dynamic range and colors to a proportional image on a typical internet user’s screen or a cheap office monitor.
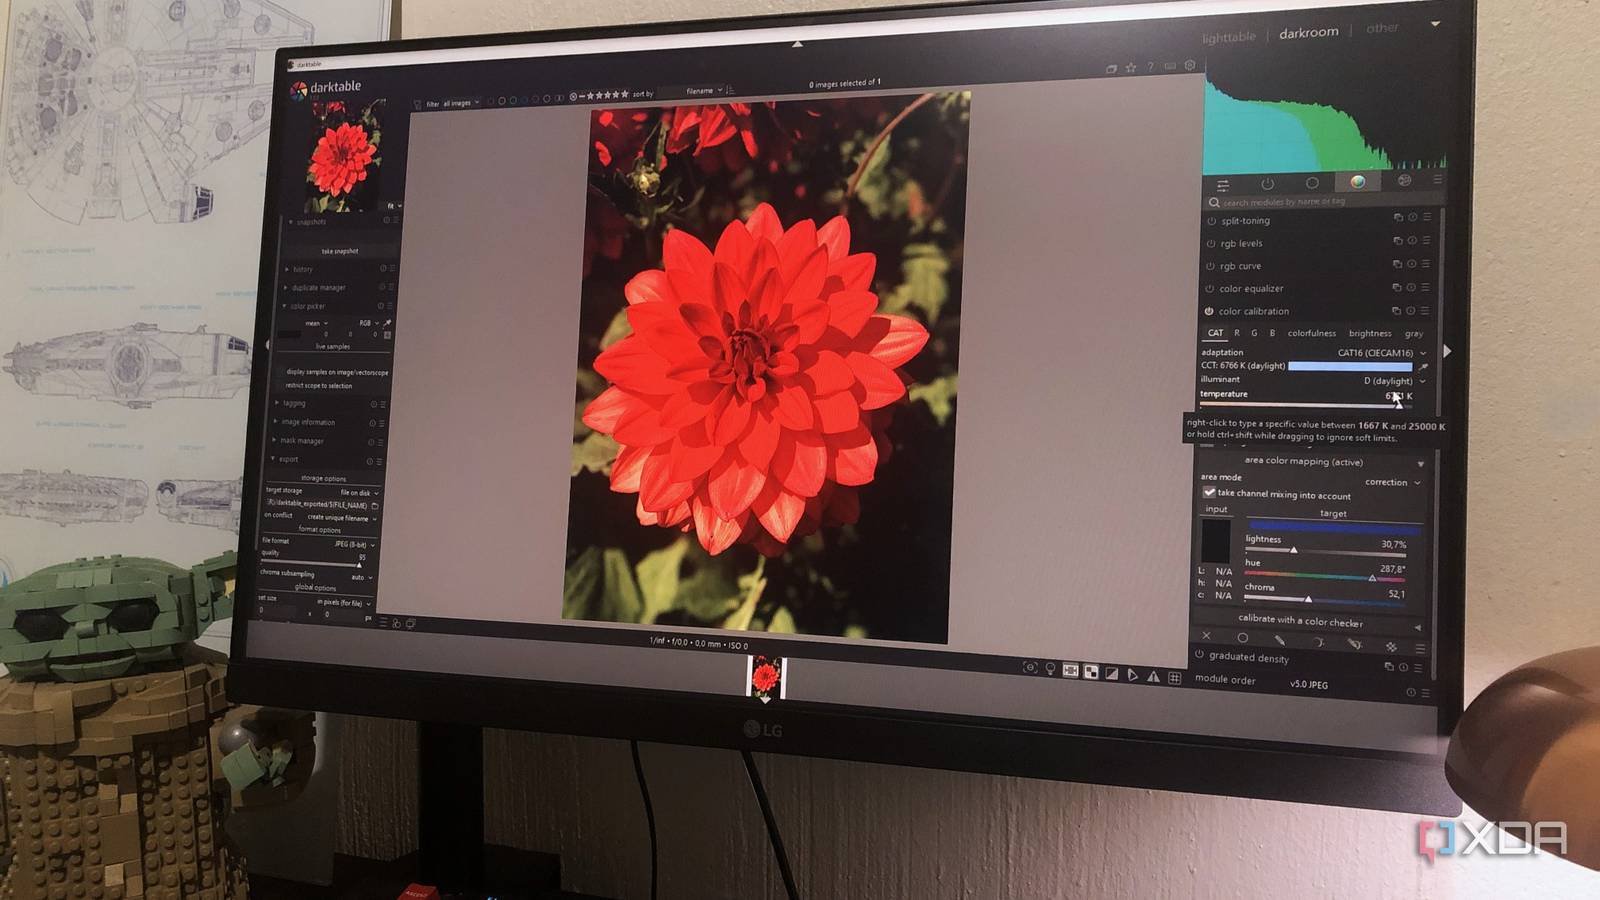
Although not recommended on a premium display, you can also set your photo editor’s color space to sRGB on the fly, so your shots look the same regardless of the screen. Below are the color space settings for exporting in Adobe Lightroom CC Export -> Custom Settings -> Color Space. They are under the side panel to the right of the Light table Export -> Global Options -> Profile On Darktable, powerful and a free Lightroom alternative.
Adjust the output sharpness
Double dipping proves expensive

The second culprit is a setting that looks inherently useful but is useless to most users — Output Sharpening. Modern raw processing is already incredibly sharp, especially if you’re shooting with decent glass on a modern full-frame sensor. During your editing workflow, you’ll likely add a basic level of shot sharpening. If you’re doing product photography, you can even brush some localized textures to highlight sheet lines in 3D printing or the machined surface of a metal component.
When you hit Export with Aggravation of speech after all, when activated, the program takes your already refined image and performs a general, automated, and highly aggressive contrast transition over the entire file. This double-dipping creates unnatural, bright halos around high-contrast edges. It makes natural sensor grain look like an overworked film grain filter that destroys smooth color gradients. The results look like poorly compressed 8-bit JPEGs or are completely unusable.
Admittedly, if your intended use case is physical inkjet printing on matte or glossy paper, it compensates for ink bleeds on paper fibers. But it doesn’t do you any favors for simple digital viewing. You can find this open link in Lightroom CC Export -> Custom Settings -> Output Sharpening.
Image editing needs care
We trust our software tools and the developers who create them, and we think they know best. This does not negate our responsibility to use the provided tools with care. Having top-of-the-line studio displays and cameras doesn’t really matter if we’re using the theoretical best settings to export files designed to meet audiences on mid-range screens. Planning your export carefully ensures that you don’t end up with unexpected surprises when your images reach their final form, whether it’s Polaroid prints or social media uploads.