Summary
-
Traditional USB SSDs provide no upgrade path, meaning you’re stuck with its initial speed and storage capacity.
-
M.2 enclosures offer easy upgrades, as simply replacing the enclosure can provide faster transfer speeds, and replacing the SSD itself can increase your storage capacity.
-
Building a dedicated external SSD with an NVMe drive can save money while allowing for future upgrades, all of which aren’t difficult to assemble.
I wanted to move my Adobe Lightroom library to a portable SSD so I could use it on both my desktop and laptop. Instead of buying a prebuilt SSD, I built my own for a fraction of the cost (and can upgrade later if needed).
USB SSDs are certainly an easy solution
But they don’t offer an upgrade path
Typically, when you think of a USB SSD, Pre-made models are the first thing that comes to mind. Models like the Samsung T7 Shield, Crucial X10 Pro, and others are usually what come to mind when I think of a USB SSD.
However, these are often more restrictive than you might expect. While it’s great if you want a simple solution, there’s no upgrade path. If you buy a USB 3.2 10Gb/s drive, then you will always be stuck at that speed. If you buy a 1TB drive, you’ll always have that amount of storage.
This may be fine for many, but not for me. Yes, while I have a few drives of this style (500GB portable SSDs that I bought about a decade ago), recently when I wanted to pick up a drive to use for my photos, I wanted to go a different route. 500GB wouldn’t be enough for what I wanted, and I also wanted to have the ability to upgrade the drive in the future, either for higher capacity or faster read and write speeds.
USB M.2 enclosures make it easy to upgrade your drive
Moreover, they are not that expensive
In recent years, SSDs have become available indeed fast. M.2 SSDs can now achieves 14GB/s (or more) transfer speeds with PCIe 5.0. This is madness. USB, on the other hand, can only dream of such fast speeds. This is where M.2 enclosures come from.
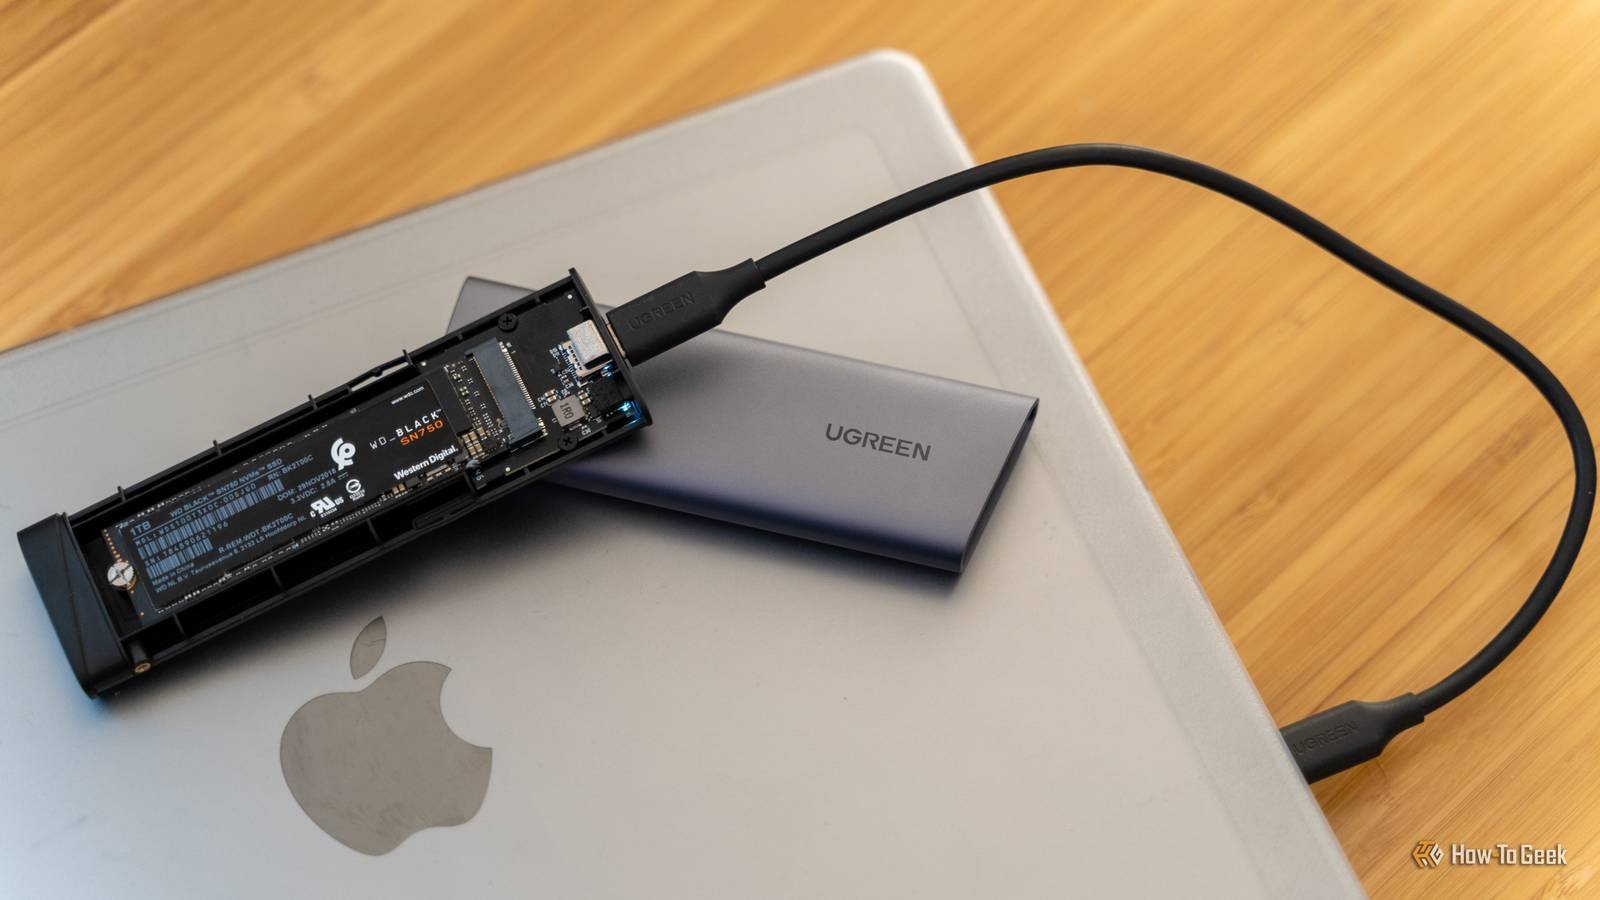
When I started looking for a way to get portable storage for my Lightroom library, I was about to pull the trigger on a 1TB external SSD, as many thought. However, I remembered that I had a few spare 1TB NVMe drives (a perk of years of being a PC builder) and figured I could just buy an enclosure to replace the old drive. Only It costs $15 on sale to purchase the USB case instead of spending $100 on an external SSD. By reusing equipment I already owned, I not only saved money, but it also gave me the opportunity to upgrade in the future.

You see, instead of being stuck with one transfer rate limit like with a prebuilt external SSD, I can simply swap out the enclosure for one that uses a different standard like USB4, Thunderbolt 4, or whatever. even the coming Thunderbolt 5and keep the same 1TB drive if I need faster transfer speeds in the future. Or, if I need more storage, I can simply take the 1TB drive and swap it out for a 2TB, 4TB, or even 8TB NVMe drive – which can sometimes be a bit cheaper than buying another prebuilt external SSD.

- Speed
-
10Gbit
- Contact
-
USB-C
- Portable
-
Yes
The UGREEN M.2 NVMe SSD Case is perfect for building your own USB SSD at home. It offers transfer speeds of 10Gbps over USB 3.2 Gen 2 and accepts both M and M&B dongle M.2 PCIe SSDs. With a USB-C interface, it will easily connect to your desktop or laptop to provide you with fast portable storage wherever you go.
Give it a chance, you won’t regret it
At the end of the day, building my own external SSD saved me quite a bit of money. Plus, it will allow you to upgrade any part of the memory drive relatively easily in the future. Building my own drive checked all my boxes, including the price, which I didn’t expect when I set out to migrate my Lightroom library.
If you have spare NVMe drives or are buying a new one, I recommend building your own portable SSD instead of buying a prebuilt one. Typically, only one or two screws are required, and you’ll have more flexibility down the road.