Sometimes you have to make a commitment to do something, regardless of whether or not you get the job done. If you don’t fail, you’ll never learn. If you don’t try, you’ll never start. This was the rationale behind my first design-to-print 3D printing project.
This seems like an odd choice considering I don’t have issues with Wi-Fi signal.
Why did I do it?
I’ve reached the stage of owning a 3D printer where I can’t wait to start designing and printing my own projects. The only problem is that I come from a background with very limited design experience. I did a bit of CAD/CAM at school 25 years ago and I played around with Blender and similar packages purely out of curiosity.
The most I got with the 3D design was that the single player level in Hammer was bad. Half-Life level editor, all those years ago. It never saw the light of day, but the experience gave me a renewed appreciation for 3D design.

So I was looking for ideas to start modeling. My original idea was just a clip for a trash can that wouldn’t stay closed, but the design will require more thought than I first thought. I then started thinking about very simple elements that I could design quickly and see results quickly. My goal is to build confidence by doing this rather than researching CAD software.
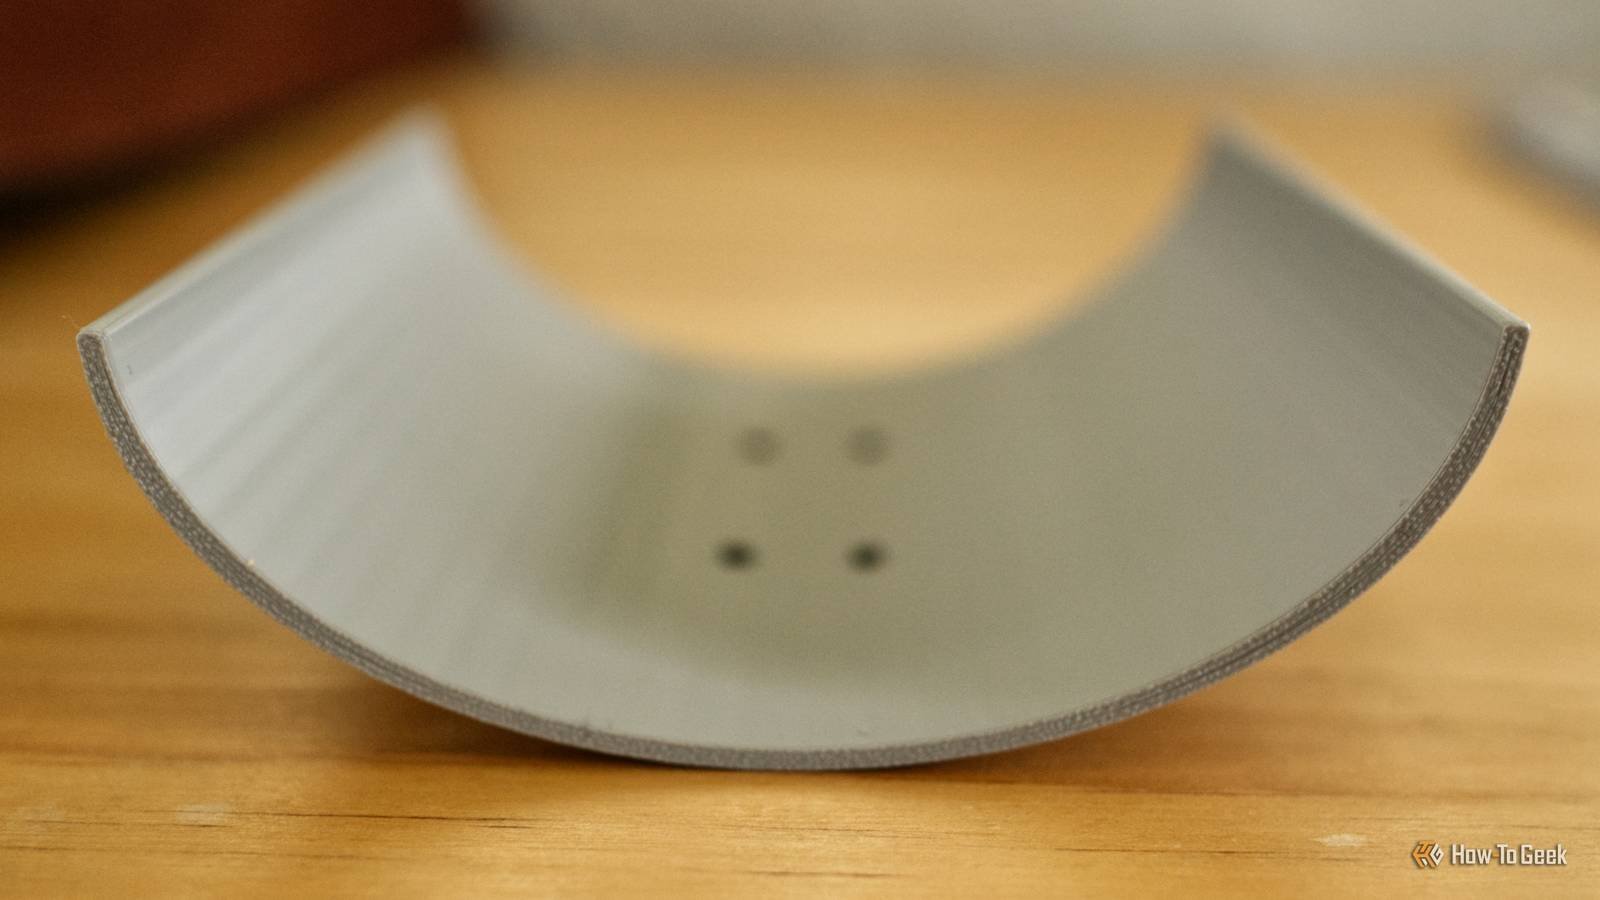
So I decided on a parabolic Wi-Fi signal booster. They are so named because they use a parabola, a U-shaped symmetrical curve, to direct signals in a specific direction. My house is small and my Wi-Fi signal is pretty good, but this seemed like an easy first step.
It starts slow in TinkerCAD
In the past I have been briefly engaged TinkerCADuser-friendly but limited web-based design software that uses simple primitive shapes. I also downloaded before starting this project FreeCADa more powerful but complex open source design suite.
Although my intention is to eventually move to a more complete package such as FreeCAD or Fusion, I quickly returned to TinkerCAD for this project. After measuring the router’s Wi-Fi antenna, I used four shapes to create a parabola with some holes so I could clamp the model in place.

In total, the design took about ten minutes, after which I downloaded an STL file, opened Bambu Studio, sliced it, and sent it to the printer. The final model came in about 30g of filament and took over an hour to print. I wrapped some aluminum foil around the model to route the signal and made small holes in it to lock the amplifier in place.
While I was hoping for success, I felt a sense of accomplishment when I lifted the model off the print bed. I could make a similar contraption with some cardboard, but turn a vague idea into a digital file and then a physical object in over an hour? That’s what it’s all about.
To my surprise, it worked
After attaching the dish and breaking the zip ties, I attached my amplifier to one of the outermost antennas on my TP-Link router. I then used Apple’s built-in Wi-Fi Diagnostics tool to measure the signal and transfer speed. Here’s what I see:

Now I went to the router and removed the dish. I measured the signal and transmission speed again:

What I didn’t expect was to see a noticeable drop in signal strength and transmission speed when I took the dish:

The end result was a modest success, with an increase in signal strength of about -10dB and an improvement in transmission speed of up to 300Mb/s. Since my router is at one end of my house (where the internet connection enters the property), I could realistically now print a few more and attach them to the other antennas on my router to direct the signal to the back of the house.
So what did I learn? Always follow your dreams, your Wi-Fi signal will be better for it.
In many ways it was a perfect first project. I had some success with a simple project that cost me a few cents of yarn and ten minutes of design.
Now the hard work begins. Time for me to turn my newfound speed into raw skills and learn proper modeling, prototyping, and perfect objects.