Some 3D printed objects need to be stronger than others. Weight-bearing items like hooks and brackets require a bit more thought before being sent to the printer, which is a simple case of positioning them differently on the build plate.
Your 3D prints are weakest at layer lines
Filament deposition modeling (FDM) builds elements layer by layer by placing filament lines on top of each other. Although the filament is melted at the point of extrusion, this production method has one clear weak point: where the sheet lines meet.
There are many things that can affect the strength of an element, such as the overall design the type of filament used. How the weight is distributed over these layer lines is another important factor. One thing you have to think about is how the lines come into contact with each other.
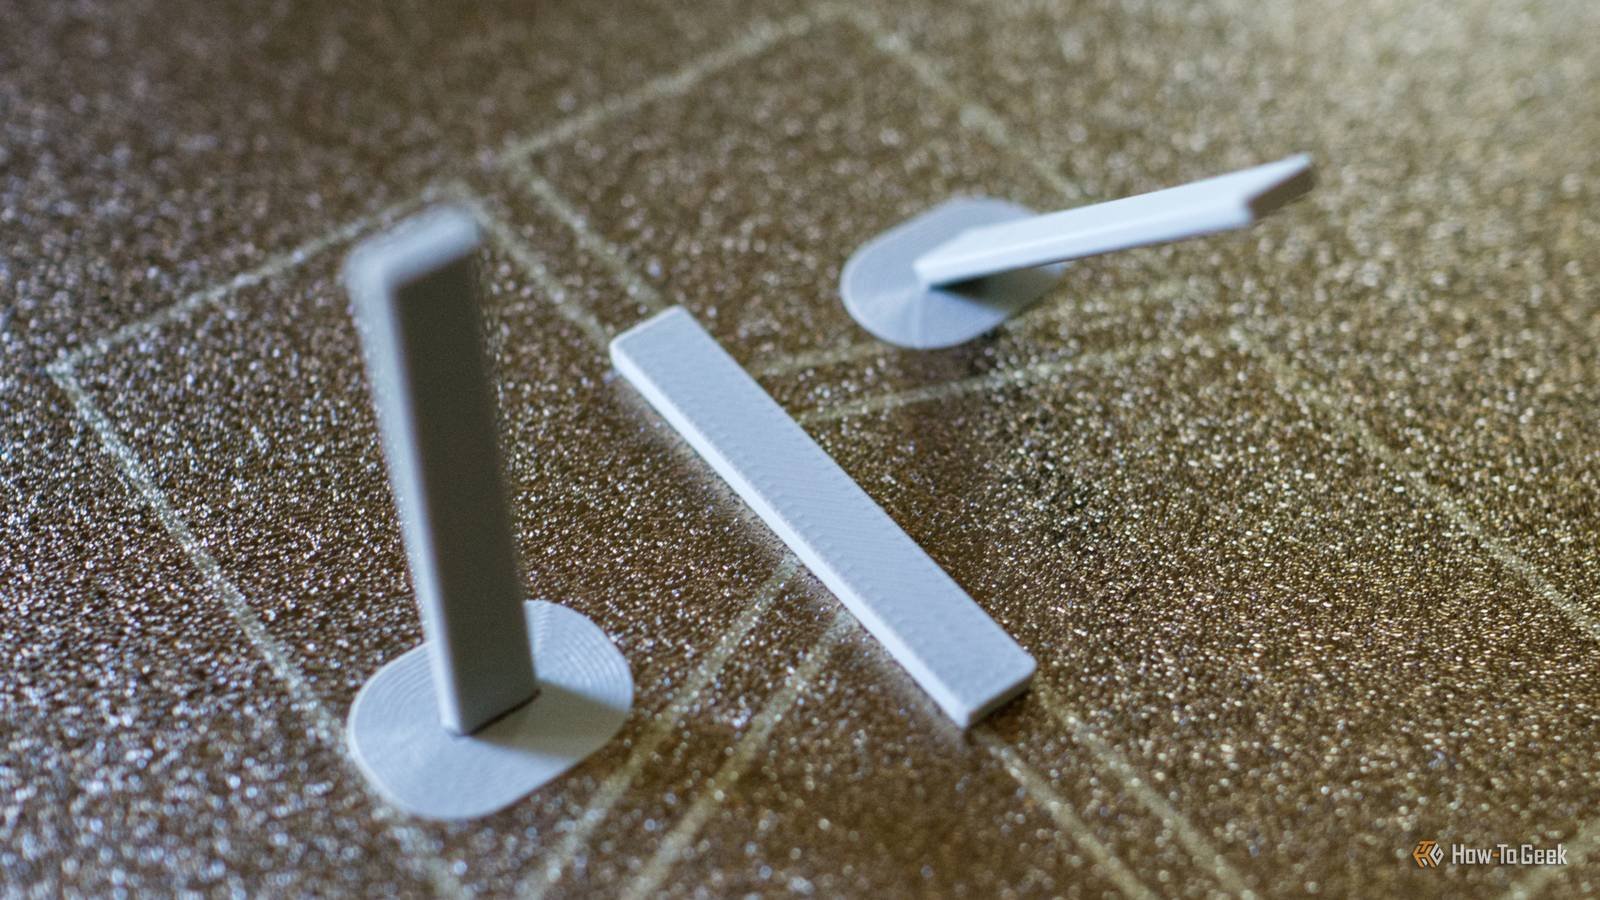
The larger the contact surface area, the stronger the bond. To demonstrate this, I printed some simple rectangles at 100% fill density. The first example is printed in upright position:

If we apply force to both ends of the object, it is easy to break it along the layer lines because the contact point is so small:

Conversely, here’s an item I printed all face up:

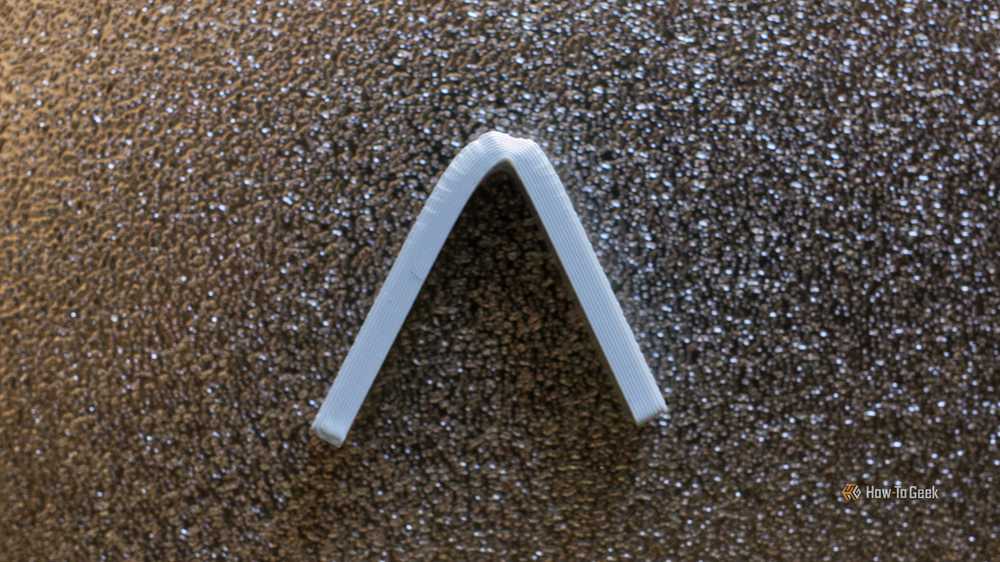
This element is stronger when placed under the same pressure because the layer lines are joined along the entire length of the object. In fact, when we apply too much pressure, the object bends and does not break:
Consider strength when arranging models in the slicer
Your 3D printer will always print in layers from the bottom layer up. Before you send the job to the printer, it will do it the way you see it in your slicer. You have many options to change how the object is created before you create it.
For many objects you download and print, the author has probably thought of this. But nothing stops you from moving the item around the build board to test and improve it. You are left to your own devices for things you design and print yourself.

Your slicing program allows you to move and rotate objects on the construction board. You can also use the Lay on Surface tools, which allow you to click on a face to place an object on the ground. Auto-orientation features are handy for some prints, but remember that you understand the context of your print better than the slicer.
For any item that will be subject to any force or pressure, you need to carefully consider the print orientation, whether it’s downward pressure on a coat hook, horizontal pressure on a handle, or pressure from both angles that require compromise.
45 degrees is the best choice when printing
Although the goal is to maximize contact with the sheet surface, sometimes you have to make a tough decision. For some objects, pressure comes from two or more angles. This means that the optimal adjustment for one angle is at the expense of the other.
The answer is to print at a 45º angle to maximize surface contact between layers in both directions. It’s a functional compromise you sometimes have to make to get the best all-around power.
I also printed an example at a 45º angle to demonstrate this fact. The object is thin, but the layer lines have more surface area than the first (vertical) print above:

Under the same pressure test, this fabric performed better than the first sample and worse than the second. But if it was an item that needed to be as strong as possible in more than one direction, an angled print would be my best choice.
Of course, you still need to figure out the angle. This may involve turning up a 90º corner on the edge, for which a small flat piece will be cut from the corner. improve bed adhesion:

Another thing you need to address when choosing the optimal 45º angle is the supports and edges. I was able to print my 45º example above using an edge that Bambu Slicer automatically added for me. For heavier items, supports are needed to avoid problems with protrusions at the top of your print.
Ultimately, you’ll have to do this on a case-by-case basis. Using a little more filament on an initial print that requires support will consume less filament than if you had to reprint an item from scratch because it was too weak the first time.
3D printers are incredible devices, but they are not without limitations. Perhaps one of the most terrible how wasteful multi-color and multi-material printing can be on most printers.