If you don’t type in IP addresses manually, you first perform a DNS lookup every time you visit a website. By default, your network probably points to a public DNS server, such as your ISP’s server, Google’s 8.8.8.8, or Cloudflare’s 1.1.1.1. They are convenient and fast, but it also means that a third party gets an unedited view of the websites you visit.
If you want to minimize the amount of data you give to Google, you can replace the public DNS server with a cheap Raspberry Pi running Pi-hole and Unbound.
Your DNS server recognizes every website you visit
Your DNS lookup requests are usually not encrypted either

Any time you connect to a website with a domain name, DNS server somewhere in the world, it converts that domain name into the IP address that your computer actually uses behind the scenes to connect to. Any DNS server you use has full visibility of every domain you enter into your browser, and if your DNS queries are not encrypted, cuts Your DNS queries can also look up the websites you visit. That’s a lot of information to trust a third party.
Your ISP can still see what IP address you’re connected to even if you’re not using a VPN, and this can then be associated with a domain.
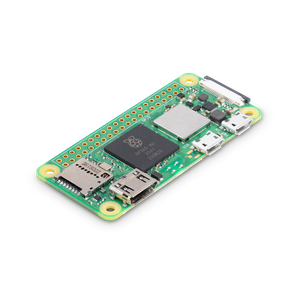
Fortunately, you can use the inexpensive Raspberry Pi Zero 2 W and several open source projects to solve the problem.
Pi-hole and Unbound can give you privacy and security
There is no need to query the DNS server directly

If you want to use domain names to connect to websites, you need a DNS server, but nothing tells you that you actually need one directly Ask the DNS server. Instead, you can create your own using a program called Unboundis a recursive solver.
He speaks directly without connection entire “DNS Hierarchy” that means it fetches data directly from the root server, TLD servers, authoritative name servers. Basically, it queries all the computers that connect domains to their IP addresses for their information and then stores that information locally. When you want to visit that domain in the future, you’ll be able to retrieve Unbound’s saved result instead of asking Google or Cloudflare to connect you to the website.
- Brand
-
Raspberry Pi
- CPU
-
Quad-core 64-bit ARM Cortex-A53
- Memory
-
512 MB SDRAM
The Raspberry Pi Zero 2 W is super small and super affordable, but has enough computing power for a variety of DIY projects. You can use it as a Klipper/Mainsail, super compact home or media server, etc. You can use it to create a handheld retro game console.
You don’t need Google’s 8.8.8.8 server at all – everything required lives on your home network.
In addition, Unbound can use DNSSECuses cryptography to verify that the DNS records you receive have not been modified. Although rare, DNS poisoning used to redirect traffic from legitimate websites to malicious clones to steal sensitive information such as credit card numbers. Large DNS servers attract targets as they are successfully compromised one could affect tens of millions of people.
It’s unlikely to be a problem, but running your own little DNS resolver that double-checks a website’s identity makes you very resistant to such attacks.
Pi-hole is a great natural pairing with Unbound. A pi-hole acts as a network-wide DNS “collapse”. When your devices want to join a domain, the Pi-hole checks its blocklists. If the domain is known to run ads, trackers, or host malware, Pi-hole returns 0.0.0.0, preventing you from connecting to the blocked domain in the first place.
Because filtering happens at the DNS layer, you don’t need to install software on every individual phone, smart TV, or IoT device in your home.
When used in conjunction with Unbound, you get two layers that work in tandem. Everything on your network first connects to the Pi-hole, which automatically blocks unwanted domains. Once your traffic is filtered by the Pi-hole, it’s forwarded to Unbound, which maps the domain name to an IP address for you, and you’re connected.
No third party is required and you can block enough malware before it has a chance to infect any device. You have complete control over your network for small one-time hardware costs and small amounts of electricity. Once the local cache is loaded, retries are almost instantaneous.
Building Pi-hole and Unbound
A watch and a Raspberry Pi is all you need
To get started, flash Raspberry Pi OS Lite (64-bit) to a microSD card using Raspberry Pi Imager and install it on your Raspberry Pi. Next, log into your router and specify Raspberry Pi static IP address –if it changes, everything will stop working.
With that kit, SSH into the Raspberry Pi, set up a Pi-hole running curl -sSL https://install.pi-hole.net | bashand then connect to the web dashboard to complete the installation. It’s quite accessible – the installer is designed to be very user-friendly and will walk you through the important parts.
After that, SSH in again and install using Unbound sudo apt install unbound. You need to make sure that it is listening on the loopback address (127.0.0.1) on port 5335 and that DNSSEC is enabled. To do this, create a configuration file at “/etc/unbound/unbound.conf.d/pi-hole.conf” as follows. Pi-hole instructions. It should look like this:

Now you need to tell the two devices to actually talk to each other. Open pi-hole control panel and go to settings, then set upstream DNS to custom entry 127.0.0.1#5335 and clear all other optionsincluding Google’s 8.8.8.8. Disable Pi-hole’s DNSSEC.
Finally, point your router’s DNS settings to the Pi’s IP address.
There are several tradeoffs
The combination of Pi-hole and Unbound is great if you care about privacy or are a homebody who can use granular control. However, it has several drawbacks.
The first time you visit a new domain, the lookup will be slower than a public resolver because Unbound has to load everything once the first time. Subsequent visits a lot faster, but that initial lag is something you’ll probably notice.
Also, remember that you are creating a single point of failure. If your Raspberry Pi is knocked off a bookshelf by a curious cat, your entire home network will lose internet access unless a backup resolver is configured or you fix the problem.