Looking at your desktop right now, you probably have a stream deck for shortcuts, a special number pad you rarely use, and a volume rocker. The problem with commercial control centers is that they’re expensive, often running more than $150, and locking you into proprietary, resource-intensive software. You may be a victim of carrying multiple devices that you simply don’t need. However, by spending less than $20 on a few choice parts from AliExpress or Amazon, one 6-key dual encoder keyboard All the devices I mentioned above work with zero background CPU usage.
Building a special automation keyboard or the macro pad, as it was otherwise called, used to be a hobby reserved for people who could solder and code in C++. However, thanks to the explosion of RP2040-based microcontrollers and modular software like Vial, you can build a professional-grade peripheral for less than the price of lunch.

The hardware you need
It can be super cheap
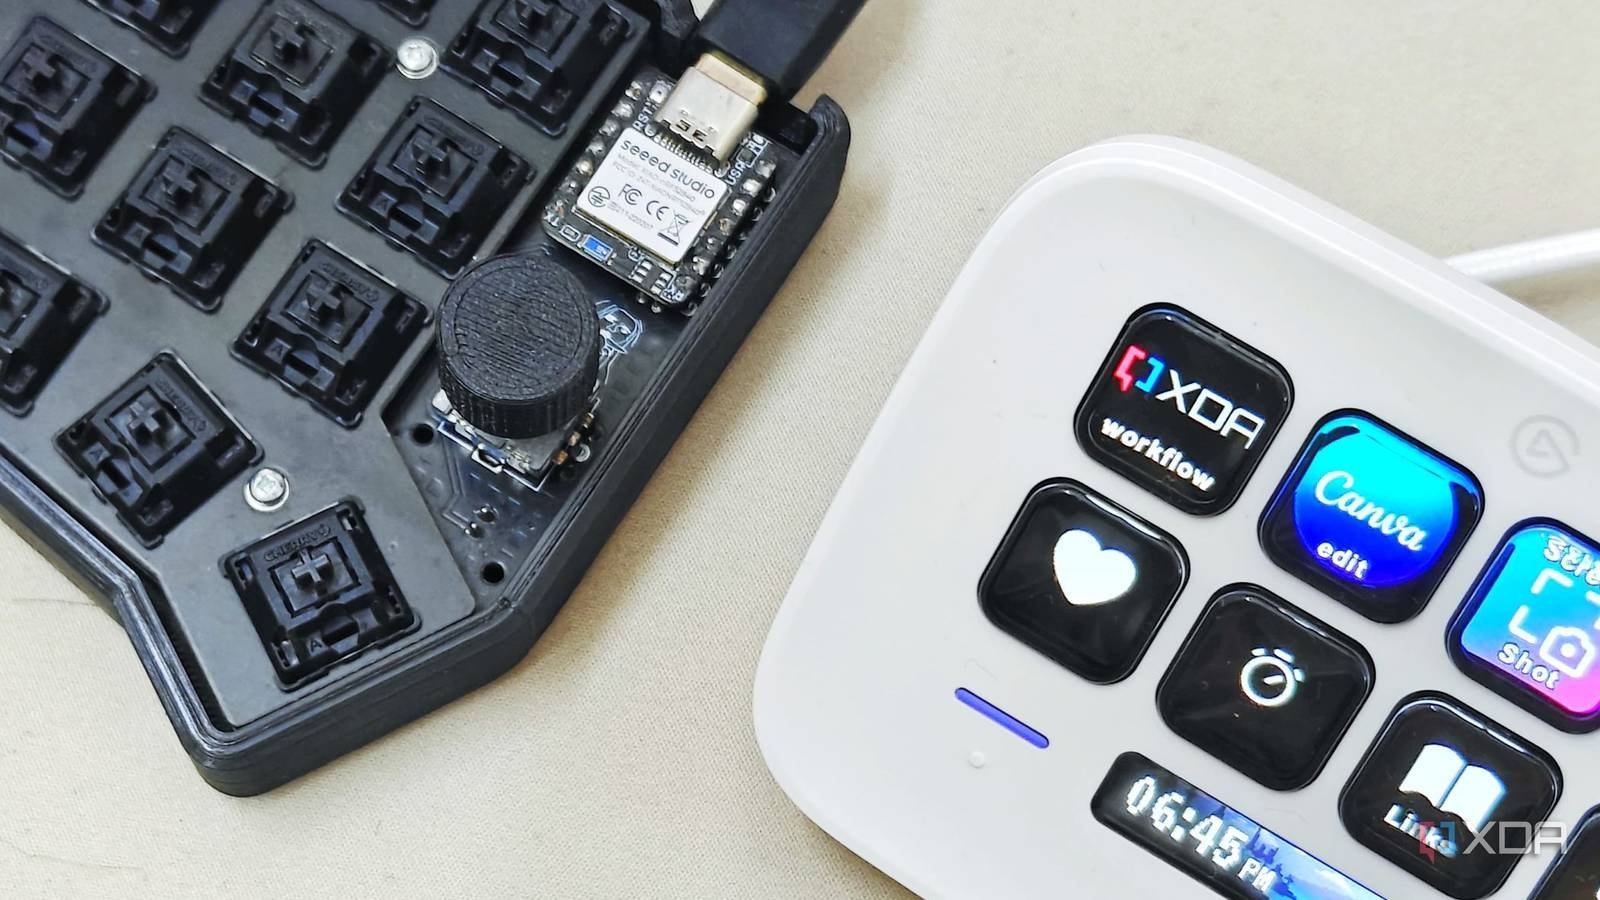
When you start, you must first take the brain of the device. This is where the Waveshare RP2040-Zero or the Seeed Studio Xiao RP2040 come in. These are tiny boards smaller than a postage stamp but powerful enough to handle complex layer logic and RGB lighting if you want.
They come with native USB-C support, so no more searching for micro-USB cables in 2026, because realistically, you probably already have them all. With all these features on offer, they usually come in at just a few dollars, meaning you’ll stay well under your budget.
Next is the actual touch and click base of your macro pad in the form of switches and keys. When picking pieces, you can use budget-friendly openers such as Gateron Yellows or Akko V3 creams. They come in very cheap at around $6 for ten packs when you buy smaller packs. Of course, since you’re only attaching a macro pad, you won’t need a full keyboard layout, and you’ll save even more money.
Note that you don’t need a fancy bag. A 3D printed sandwich mount or even a simple acrylic plate can be very inexpensive and keep your costs under $5 for this item in particular. However, since you built it yourself, if you want to opt for a super fancy case, be my guest.
There are other forms of help you can also get, such as encoder (button). The $2 rotary encoder replaces your custom volume knob and can be programmed to move between video graphics, zoom in Photoshop, or switch between multiple windows you have open.
Coding is no longer necessary
Whether you can code or not, you can install your keyboard

“Once you pick up the hardware, you can start working with the software without writing any low-level C++ code. Configurable software like Vial or CircuitPython often allows you to remap keys and define macros with minimal coding using a small script or visual interface. The breakthrough is that you no longer need to change the software you want every time; remap keys and redefine macros in a browser-based interface, and the changes are applied to your keyboard immediately after connecting it.
You can even select layers, meaning that even if you only have six physical buttons on your macro pad, you can use layers to turn that into 24 different functions. When you switch between layers, each button becomes a different function, meaning you can have one for gaming, one for video editing, and one for system controls using the same device.
If you configure the macro pad correctly and use it to its full potential, it can replace a number of different devices. Instead of having a stream deck, you can use your new macro panel for your macros to mute your OBS microphone and turn off the camera. In OBS, you can even choose a number pad layer that activates when you hold down a button, so you can get rid of your individual number pad altogether. Of course, it can also work as a media controller. A rotary encoder can control volume, play/pause and skip tracks with greater tactile precision than a cheap plastic wheel.
Easier and more budget-friendly than ever
For less than $20, you can save an entire desk space
If you can plug in a USB cable and follow a 10-minute wiring guide, you’re overpaying for gaming-brand macro pads that you can DIY very easily with super-cheap components. The best part about designing something custom is that you get to choose how much you want to spend on each individual piece.
Once complete, you can get rid of many different devices on your desk, including your streaming deck, number pad, and rotary encoder, and free up space on your desk while still having all the features. Really and truly, this automation keyboard has become the most useful tool on my desk, and I made it myself for the price of a mouse pad.